Amber Glass Soap Dispensers: Bottle Styles, Pump Choices, and Practical Uses
An amber glass dispenser can bring a warm brown tone to a sink without changing the surrounding fixtures. Yet two bottles that look similar in a photograph may behave quite differently: one delivers liquid soap, another produces foam, and a third needs a fitted bracket to stay on the wall.
The useful choice is the complete dispenser. Its bottle shape affects where it fits, its pump determines how it dispenses, and its finish and label determine how it sits alongside the things already in the room.
What Amber Changes
Clear glass lets the soap’s own color become part of the display. Translucent amber glass adds a brown tint to what you see through it. A pale liquid may leave the bottle looking relatively light; a dark liquid can make the filled area appear much darker. Neither result can be predicted precisely from an empty-bottle photograph.
The background matters too. A brown bottle has a clear outline against a pale wall or countertop; against dark tile, that outline may be less distinct. If checking the remaining soap at a glance matters, leave part of the glass uncovered. A broad label can conceal the liquid level even when the glass itself is translucent.
Amber glass can reduce the transmission of some wavelengths of light. That does not establish a particular dispenser’s protection rating or show that it will extend the life of your soap; follow the refill’s storage directions.
Brown appearance also does not identify how the bottle was colored. Some glass dispensers include a painted surface, while others use colored glass. For a decorated bottle, cleaning must protect the finish as well as the glass: a soft, damp cloth and a mild cleaner may be specified where abrasive scrubbing is unsuitable. Use the instructions for the actual bottle rather than assuming all glass is dishwasher-safe.
Bottle Styles, Sizes, and Ways to Place Them
Shape, capacity, and placement answer different questions. Shape gives the dispenser its outline, capacity describes how much it holds, and placement determines how you reach and maintain it. Comparing these together makes a product photograph much more useful.
Rounded Shoulders and Broader Necks
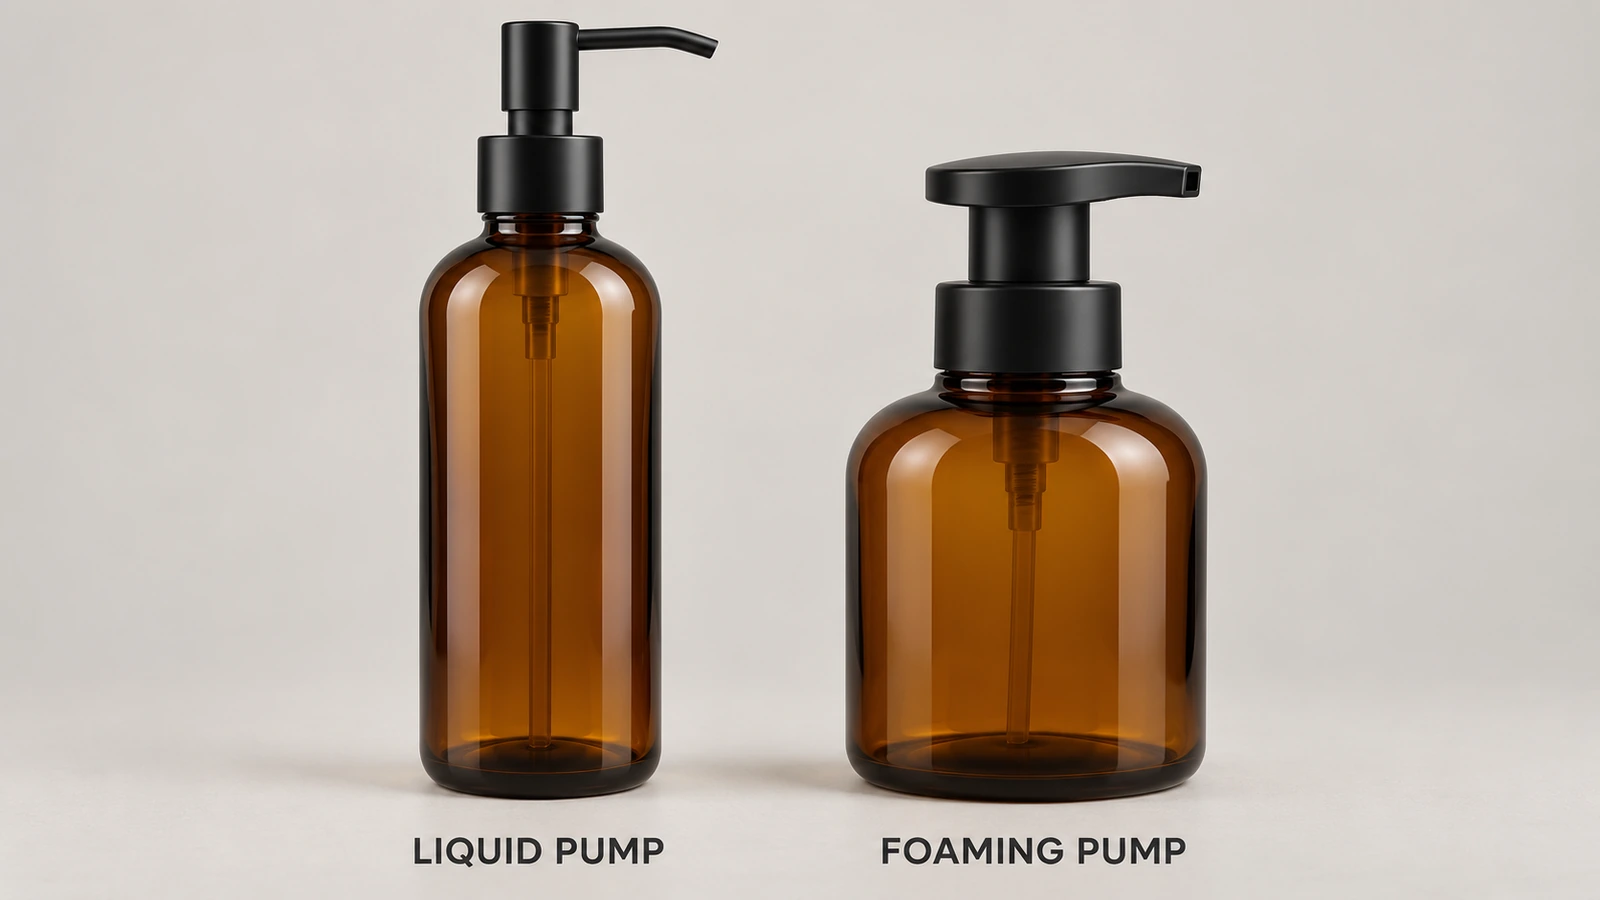
A familiar amber style has rounded shoulders that narrow into a small neck, with a long, straight body below. It gives a liquid-soap dispenser a bottle-like profile and leaves a clear area for a label beneath the shoulder.
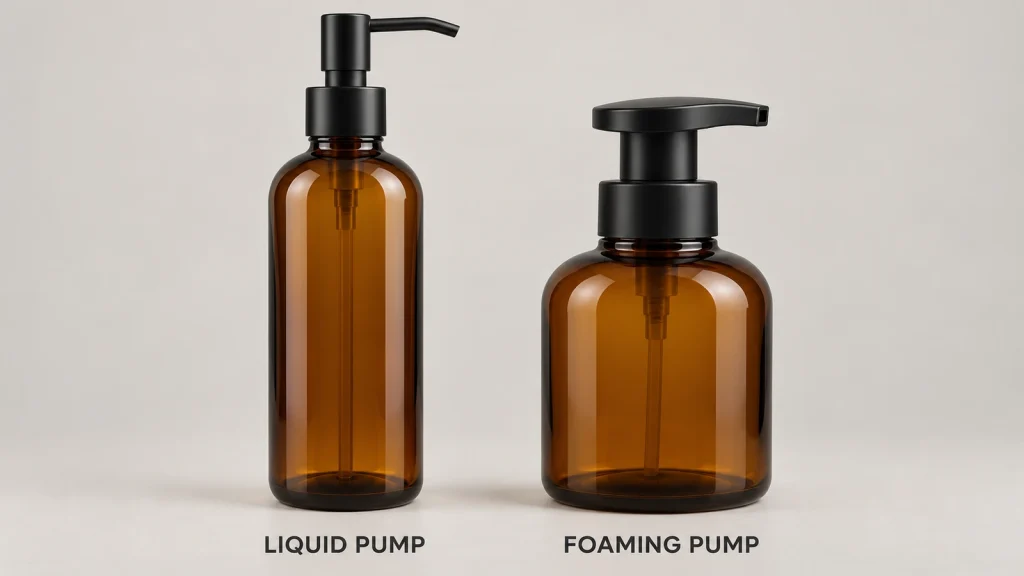
A shorter-shouldered bottle with a wider neck and broad pump collar creates a different proportion. This appears in actual amber foaming dispensers: the pump assembly becomes a larger part of the silhouette.
These are shapes to recognize, not rules that divide liquid and foam bottles. A foaming bottle can have rounded shoulders too. When adding a label, keep its main text on the straight body where it can be read easily; wrapping a wide design around a curved bottle can put some wording out of view.
Compare Capacity with the Complete Dimensions
These published product dimensions show how bottle-and-pump configurations differ. They are examples from one brand’s range, not measurements made for this article, standard sizes for amber dispensers, or specifications for our collection.
| Example configuration | Capacity | Height including pump | Bottle diameter |
|---|---|---|---|
| Round-shoulder liquid dispenser | 250 mL | 180 mm | 59 mm |
| Same liquid-dispenser series | 300 mL | 190 mm | 68 mm |
| Same liquid-dispenser series | 500 mL | 220 mm | 69 mm |
| Same liquid-dispenser series | 1,000 mL | 260 mm | 85 mm |
| Short-shoulder foaming dispenser | 500 mL | 190 mm | 80 mm |
Within the liquid series, moving from 300 to 500 mL adds 30 mm of height but only 1 mm of bottle diameter. Where counter space is narrow and the area above is open, that is a useful way to gain capacity.
The two 500 mL examples tell a different story. The foaming dispenser is 30 mm shorter but 11 mm wider. It may suit a lower shelf while being less suitable for a narrow ledge. Its lower height does not make it the smaller option in every direction.
Compare the complete dispenser in the space where you will use it; capacity alone cannot tell you whether it fits.
Bottle diameter also leaves out the spout and your hand. Mark the bottle’s base on the counter with a paper circle, then check the spout direction, room for a hand underneath, and space to press the top. Below a shelf, allow for unscrewing and lifting out the pump during refilling, not just the assembled height.
A Single Bottle, a Tray, or a Wall Bracket
A single countertop bottle is easy to move when cleaning or rearranging the sink. Two bottles can separate hand soap and dish soap, while a tray keeps them grouped. The tray’s outer edges add to the space required: even two bottles with 69 mm diameters occupy 138 mm side by side before adding a gap or tray rim.
Wall mounting moves that footprint off the counter and gives the dispenser a fixed position. It also makes the bracket part of the configuration.
One adjustable bracket design holds the bottle by its neck and supports its base. Loading this design involves five steps:
- Remove the pump.
- Loosen the adjustment screws and lower the base support.
- Guide the bottle neck through the upper opening.
- Raise the support firmly against the bottle’s base and secure it.
- Replace the pump.
Removing the bottle for cleaning involves releasing that support again. Leave room for both refilling and removal, and use wall fixings suited to the mounting surface.
Capacity is not enough to establish bracket fit. The 500 mL foaming example above is specifically excluded from its range’s holders, despite falling within a capacity range mentioned for the holders.
Choose a wall-mounted dispenser as a compatible bottle-and-holder combination.
If you need foam as well as wall mounting, look for a system that explicitly supports both. If moving the bottles is part of your routine, a countertop arrangement keeps that flexibility.
Choose the Pump, Then Coordinate the Finish and Label
The pump has two jobs in this choice: it must deliver the liquid as intended, and its visible parts help complete the appearance. Decide the dispensing function first. Then coordinate the exterior with the bottle, nearby hardware, and labels.
Liquid Soap or Foam
An ordinary liquid pump delivers soap in liquid form. A foaming pump mixes a suitable liquid with air during dispensing; a porous element helps form the foam. The amber bottle does not create it.
For foam, start with a matched foaming bottle and pump and a compatible, ready-mixed foaming refill.
Do not assume a thick liquid hand soap will work simply because it fits through the bottle opening.
The example liquid and foaming bottles also have different neck dimensions—28 mm and 45 mm respectively. Those numbers describe these examples, not universal pump standards, but they show why matching bottle color or capacity does not make pumps interchangeable.
Hand soap and dish soap need separate compatibility decisions. Some pumps have restrictions on concentrated dishwashing liquids because of clogging or finish damage. A kitchen pair can share its appearance while using pumps selected for the two different liquids. Adding water is not a general solution to an unsuitable pump.
What Pump Materials and Finishes Actually Tell You
A plastic pump may use polypropylene components and a steel spring. A pump described as stainless steel may combine a 304 stainless exterior with internal plastic parts. A gold-colored finish does not, by itself, identify a brass pump.
These distinctions matter when selecting both the look and the care routine. Choose a documented material and finish combination whose care instructions suit how you will use it. For example, some stainless pump assemblies specify warm water and a non-abrasive cloth and warn against acidic contact. A metallic appearance is not permission to use an abrasive polish or an acidic cleaner.
Once function and fit are settled, the surrounding fixtures offer a useful starting point:
| Pump appearance | A practical way to combine it with amber |
|---|---|
| Black | Repeat black taps, rails, or other dark details. Against a pale background, the pump gives the bottle a distinct dark outline. |
| Gold-tone or copper-tone | Pick up warm metal details or the tones of nearby wood. The reflective pump draws attention to the top of the bottle, while the glass provides a larger brown area. |
| Silver-tone | Continue the silver-colored detail of an existing tap. The amber body can then provide the change in color without introducing another metal tone. |
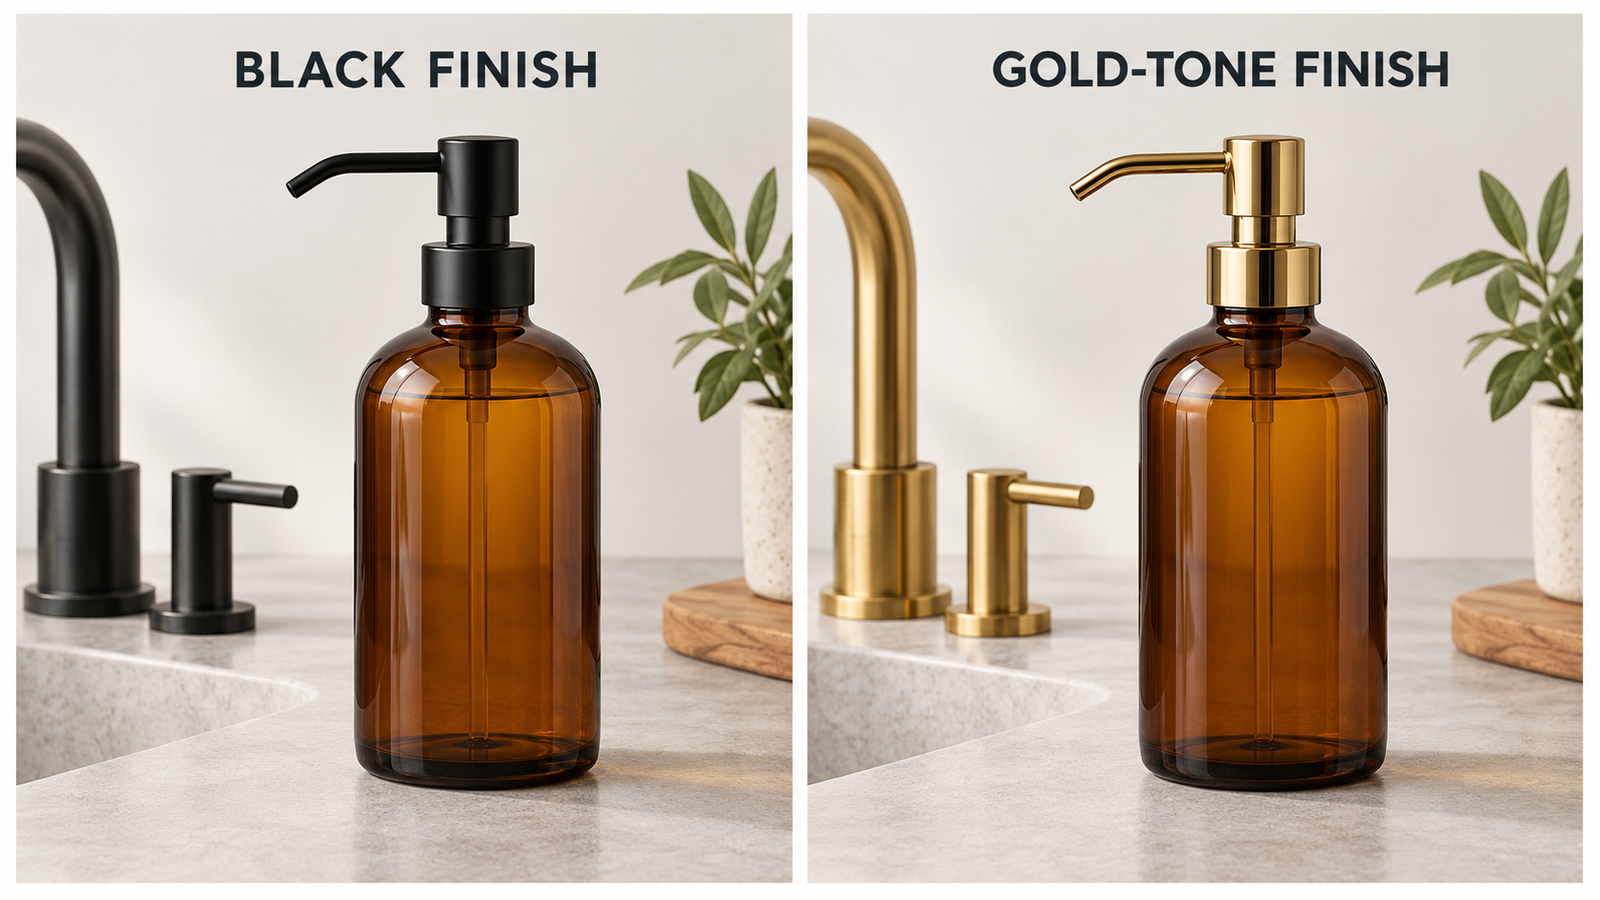
These are styling options, not fixed rules about which finish belongs in a particular room. A copper-tone pump can look quite different from a gold-tone one, and a glossy finish will catch light differently from a matte surface.
Let Labels Identify the Contents
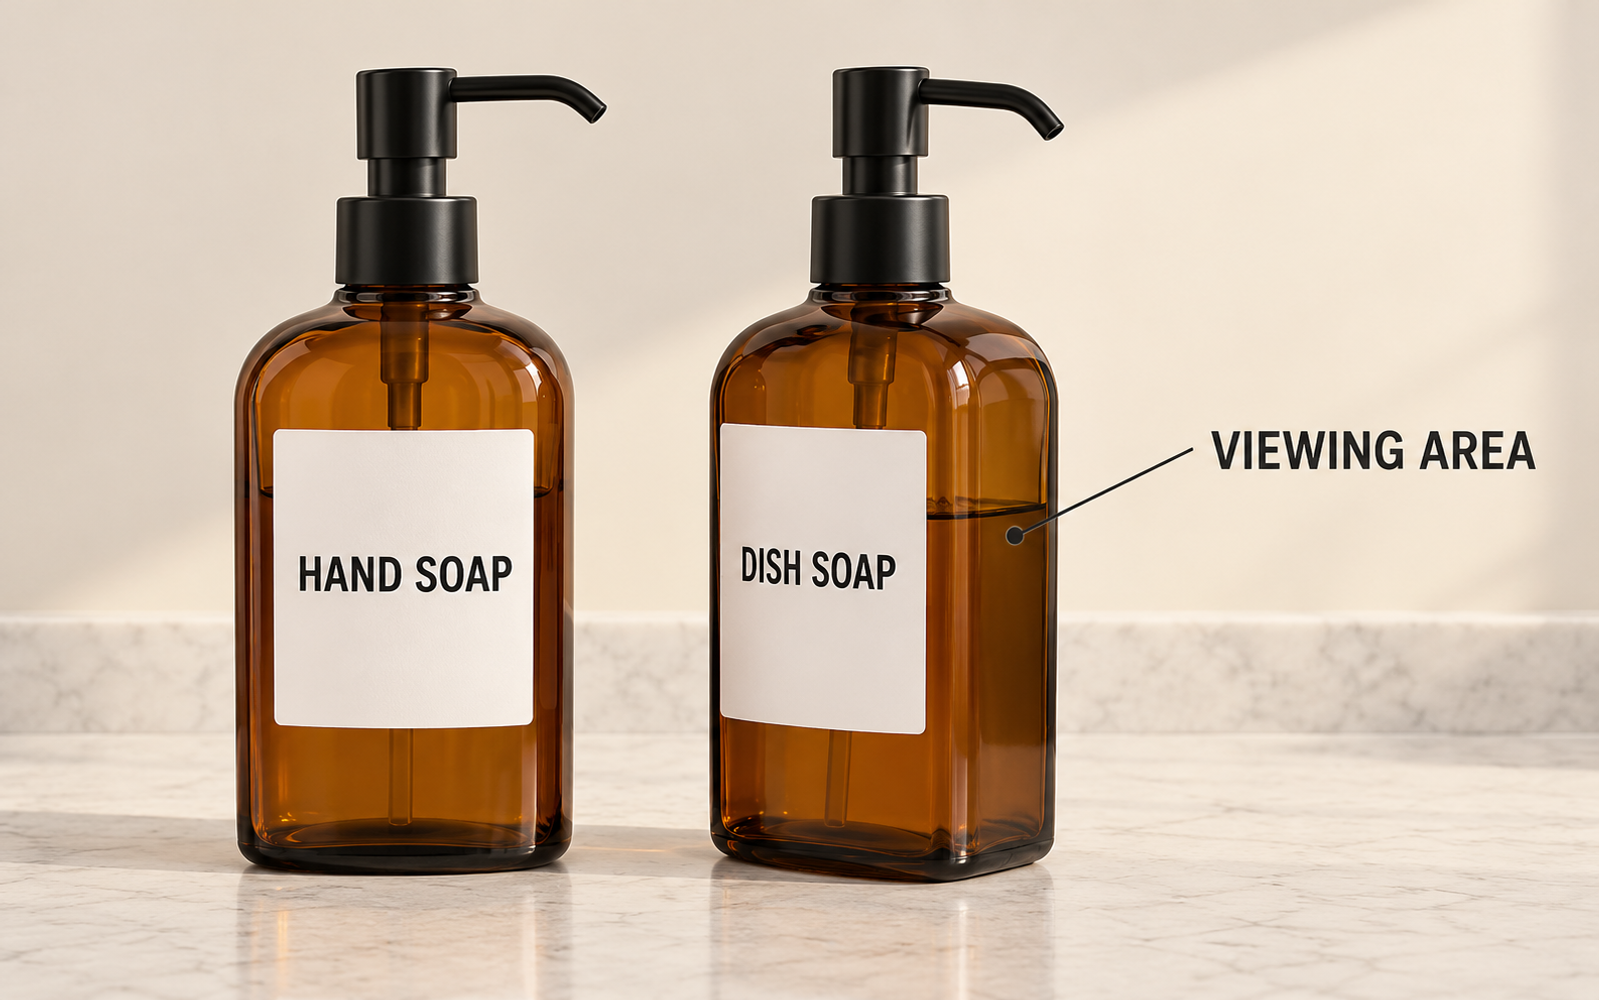
With two matching amber bottles, the label does more than decorate. Clear wording such as HAND SOAP and DISH SOAP separates uses that the bottle color cannot.
A white or cream label creates a light area against the brown glass and gives dark lettering a clear background. A smaller label leaves more of the glass visible; a larger one makes the label itself a stronger part of the overall appearance.
Keep an uncovered side or back if you want somewhere to check the liquid level. That opening removes the label’s obstruction, although dark soap or low light can still make the level difficult to see. In a pair, a shared label layout can create continuity even when the bottles have different capacities.
Three Ways to Build a Complete Configuration
The same amber color can serve different routines. The examples below combine the choices already discussed; they are suggested arrangements, not tested installations or fixed product bundles. Each starts with what the dispenser needs to do.
Kitchen: Hand Soap and Dish Soap Together
For a sink used for both handwashing and washing dishes, consider two round-shoulder bottles with the same pump finish and label style. A 250 mL and a 500 mL bottle from the example liquid series make a coordinated pair with different capacities. Give the larger bottle to whichever liquid you use more often, rather than automatically assigning it to dish soap.
Label them HAND SOAP and DISH SOAP and match each pump to its own refill. Black pumps can repeat a black tap; a shallow tray can group the bottles if its full footprint fits beside the sink. Keep both spouts accessible so using one does not require reaching around the other.
If the pair crowds the tap or leaves too little working space, keep one dispenser at the sink and place the other where its contents are actually used. Matching bottles are useful only if the arrangement remains convenient.
Bathroom: One Foaming Dispenser
For someone who wants foam immediately on pressing the pump, begin with the complete foaming assembly. The 500 mL example has a 190 mm overall height and an 80 mm bottle diameter, making it a concrete option to compare with the basin area.
A silver-tone pump can continue the detail of a silver tap, while a small HAND SOAP label leaves the amber body visible. Use the suitable pre-mixed foaming refill and check that the shelf above allows the pump to be lifted out.
If the 80 mm body is too wide for the ledge, choose a different foaming assembly with dimensions that fit. Switching to the slimmer liquid-pump example would change the output as well as the shape.
A Fixed Position in a Guest Bathroom or Hotel Room
Where the bottle should remain in one place, a matched wall bracket and liquid-soap bottle can clear the surface beneath it. Keep the content label readable from the normal use position, and choose a pump and bracket finish that works with nearby hardware.
Before fixing the position, walk through the maintenance actions: can the pump be unscrewed, the support released, and the bottle removed without hitting a shelf or adjacent fitting? For the adjustable design described above, those actions are part of cleaning the system.
A countertop bottle or tray may be the more convenient arrangement if the layout changes regularly or the wall cannot take the required fixings. A fixed position is the reason to choose the bracket; the room’s label as a “hotel bathroom” is not sufficient on its own.
Bring the Choices Together
Start with the liquid and the output you want. Find a bottle-and-pump configuration that fits the location and can be refilled there. Then use the pump finish and label to connect the amber glass with the rest of the space.
You can browse the amber glass soap dispenser collection with those relationships in mind: compare the complete arrangement, not just the shade of brown.